Instructions
Contents
Installation
You will need a trained DEFCoN network model to use the plugin regardless of the installation procedure that you choose to follow. These may be downloaded from the DEFCoN-ImageJ Wiki.
Fiji/ImageJ update site
- Make a backup of your Fiji folder. (This is always a good idea before adding an update site.
- Open Fiji and navigate to Help > Update…. Install any updates and restart Fiji if necessary.
- In the ImageJ Update dialog, click the Manage update sites button, scroll to the bottom of the list, and add http://sites.imagej.net/Kmdouglass under the URL column. You may give it any name you want, such as LEB-EPFL.
- Install all the updates and restart Fiji.
- Verify that the plugin is recognized by clicking Plugins on the menu bar and looking for DEFCoN.
Manual installation
- Download the latest DEFCoN-ImageJ .jar and dependencies from the GitHub releases.
- Place the DEFCoN-ImageJ .jar file inside your <ImageJ_Root>/plugins folder. Unzip the dependencies into the <ImageJ_Root>/jars folder.
- Verify that the plugin is recognized by opening ImageJ/Fiji by clicking Plugins on the menu bar and looking for DEFCoN.
Using DEFCoN
DEFCoN provides two kinds of networks for spot counting. They are called
- density map
- maximum local count
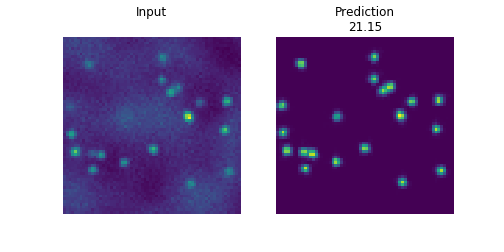
The density map network produces a density map estimate from an image. The sum of the pixel values in a region of the density map is equal to the estimated number of fluorescent spots within that region.
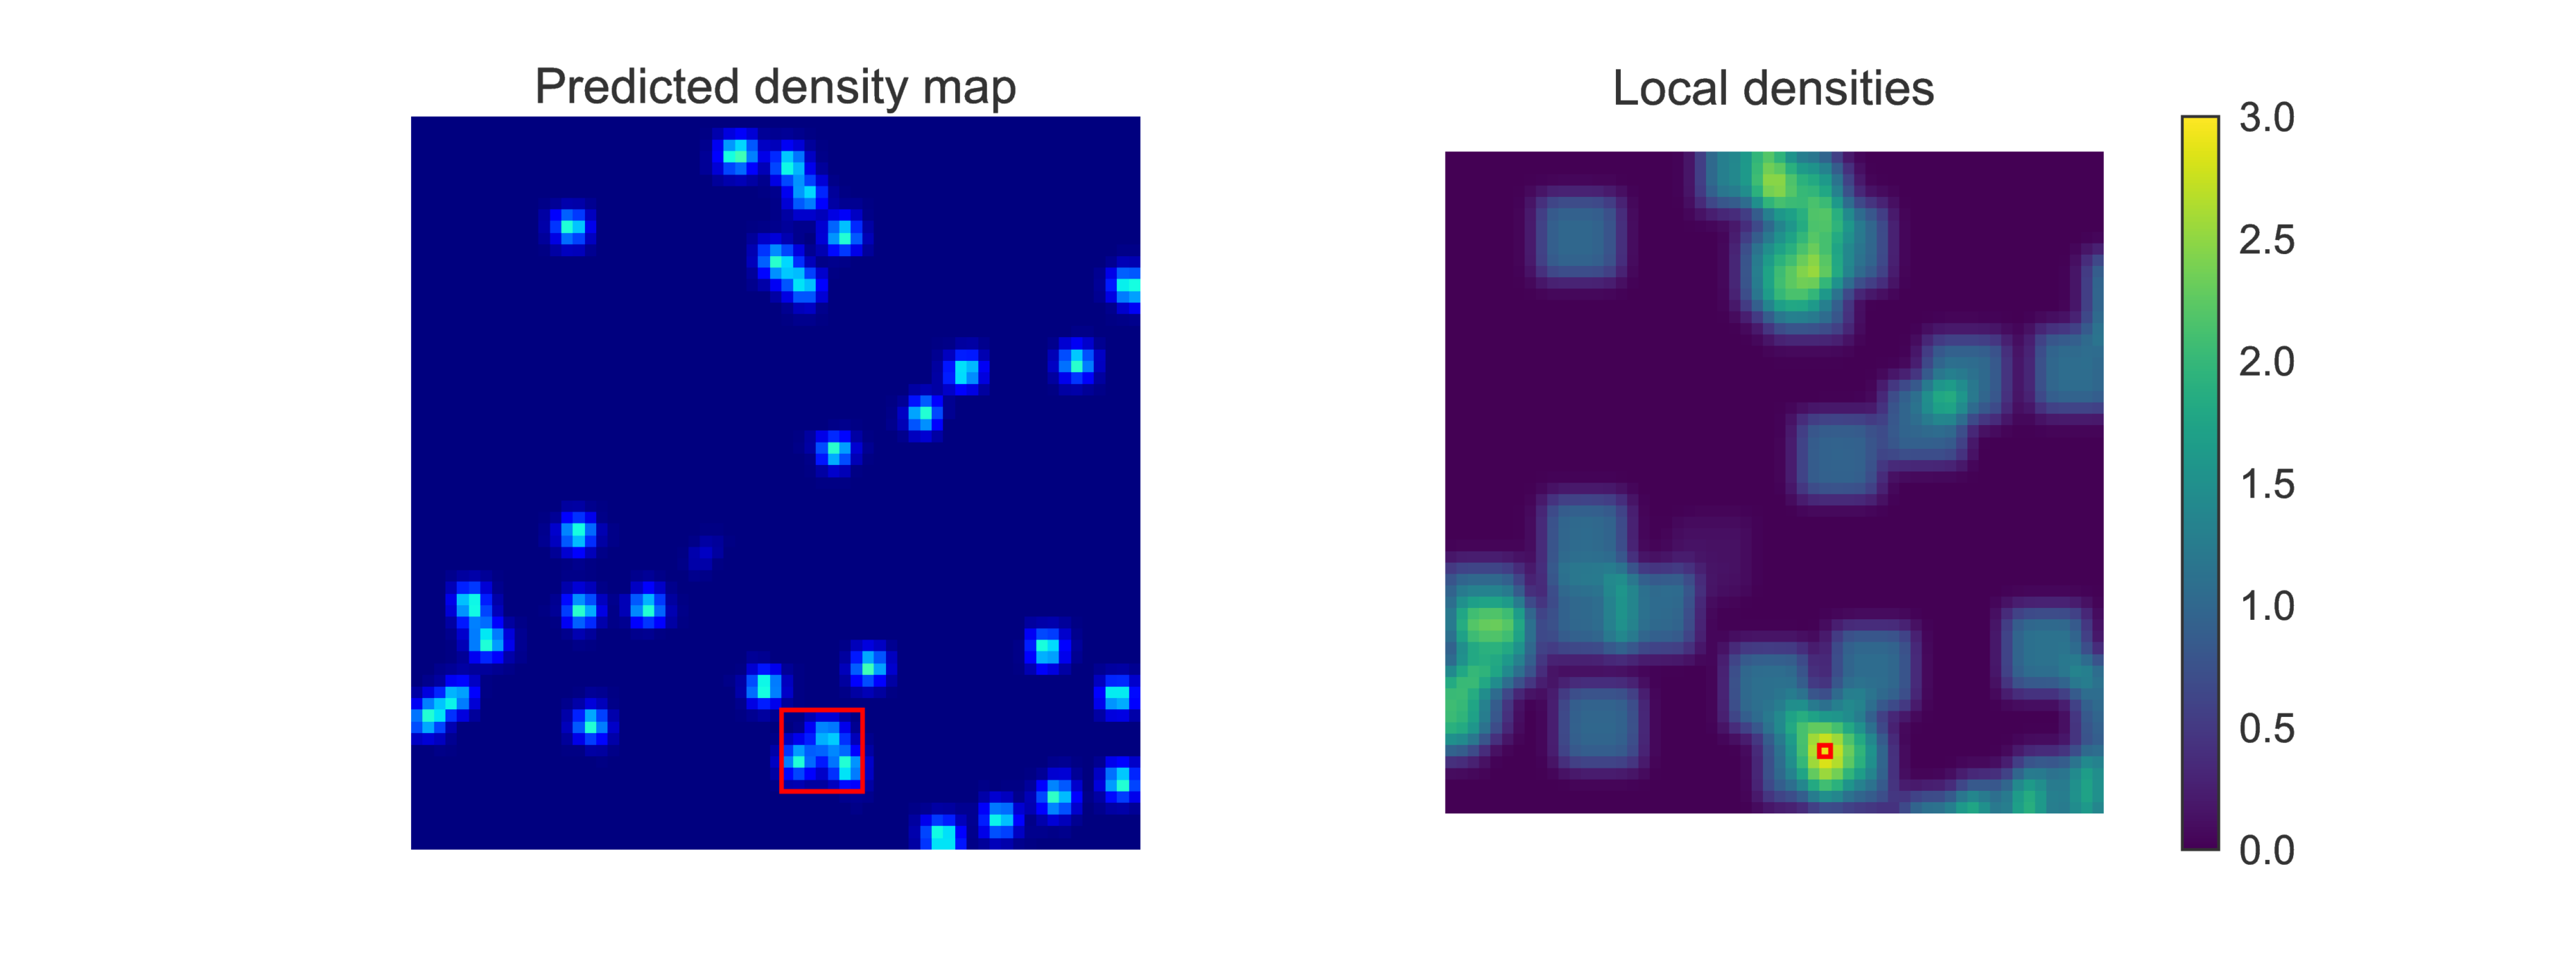
The maximum local count network first computes the sum of the pixels in all possible subregions of the density map. It returns the single largest value of all these sums. In effect, it reports the highest local density of spots across an entire image. (The original maximum count network available on the DEFCoN-ImageJ wiki uses 7x7 pixels subregions.)
The ImageJ GUI
- Open an image or image stack or select a currently open image/stack.
- Navigate to Plugins > DEFCoN > Density map… on the menu bar.
- A dialog will appear asking for you to enter the name of a folder. This folder should contain a saved TensorFlow model of a DEFCoN density map network. (The dialog will remember the previous path that was used, meaning you will not have to reenter this path every time you wish to use DEFCoN.)
- Click OK to start processing.
To compute the maximum local count, repeat these steps but select Plugins > DEFCoN > Maximum local count… instead. In the dialog, select a folder containing a saved maximum local count network.
ImageJ macros
The macro panel may be accessed through the menu bar by navigating to Plugins > New > Macro.
The macros for running the counting network and maximum local count network are:
run("Density map...","load=/path/to/density/network");
run("Maximum local count...", "load=/path/to/max/count/network");
Training your own DEFCoN networks
Information on training your own DEFCoN network may be found at the DEFCoN project page. DEFCoN will usually perform best when trained on data that closesly matches your particular use case.